Month: April 2017
SPSLogger V0.1.8 available
15. April 2017
An update for SPSLogger is available.
Version 0.1.8 contains the following improvements:
- SPSLogger is now bilingual. In addition to German, English is also supported.
- In addition, the android app is also available in English. Download the app at the Google Play Store ( https://play.google.com/store/apps/details?id=ch.spslog.spsloggerclient).
Insert the symbolics of Step 7 Classic in SPSLogger
14. April 2017
Paste from the Symbol Editor of Step 7 Classic
Select and copy whole lines (Ctrl + C).
Then select an entire line in the SPSLogger editor. A whole line is highlighted by clicking the leftmost field.
Then insert the lines with Ctrl + V.
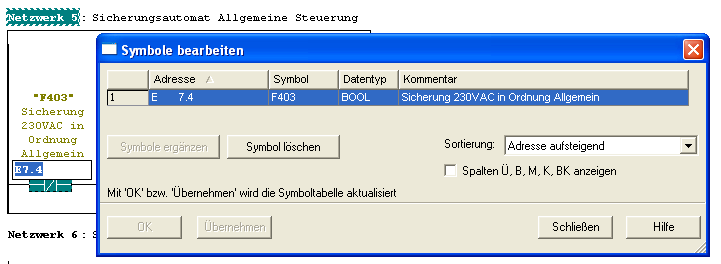
Insert the symbols from the LAD / STL / FBD editor of Step 7 Classic
Select the desired element and use ALT + Return to open the “Edit Symbols” dialog. Then select and copy all the lines (Ctrl + C).
Then select an entire line in the SPSLogger editor. A whole line is highlighted by clicking the leftmost field.
Then insert the lines with Ctrl + V.
Insert from data blocks
Select and copy the desired lines in the data block (Ctrl + C).
Then select an entire line in the SPSLogger editor. A whole line is highlighted by clicking the leftmost field.
Then insert the lines with Ctrl + V.
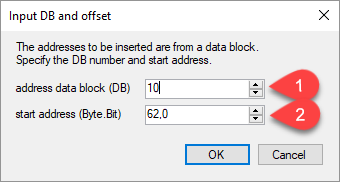
A dialog box is opened, in which the number of the data block must be entered (field 1). The starting address (field 2) must also be entered.
Insert the symbolics from the TIA portal in SPSLogger
14. April 2017
Insert from the symbol editor from the TIA portal
Select and copy whole lines (Ctrl + C).
Then select an entire line in the SPSLogger editor. A whole line is highlighted by clicking the leftmost field.
Then insert the lines with Ctrl + V.
Important: The default columns must be displayed. For example, if columns are not displayed, paste does not work.
Insert from data blocks
Select and copy the desired lines in the data block (Ctrl + C).
Then select an entire line in the SPSLogger editor. A whole line is highlighted by clicking the leftmost field.
Then insert the lines with Ctrl + V.
A dialog box is opened, in which the number of the data block must be entered (field 1).
If necessary, the starting address (field 2) can be adjusted. This may be necessary if the data block consists of structures or UDTs.
Online connection with S7-1500 (eg CPU1512SP)
14. April 2017
Sample configuration for a Siemens CPU 1512SP-1 PN.
This configuration should actually apply to all S7-1200 and S7-1500 CPU’s. However, there are still problems with practical experience. So far only the 1512SP has been tested.
Important : For communication to the S7-1200 / 1500 to work, the following must be observed:
- The PUT / GET query must be allowed in the CPU settings.
- For data blocks that are queried, the optimized block access must be switched off.
Online connection over the Internet (eg VPN connections)
14. April 2017
Sample configuration for a VPN dial-up router that is connected to a Siemens CPU S7-315PN.
The configuration must be adapted to the local connection.
Possible problems with online connections
- The response time of the controller is too slow. Measure: Increase the timeout (eg to 5000000)
- The PLC can not be reached via Ping. This is the case when the ping response is deactivated during the VPN connection. Result: The “Find connection” function is not connected. All parameters must therefore be entered manually and tested using the “Check connection” function.
Online connection via network card (eg CP 343-1 Lean)
14. April 2017
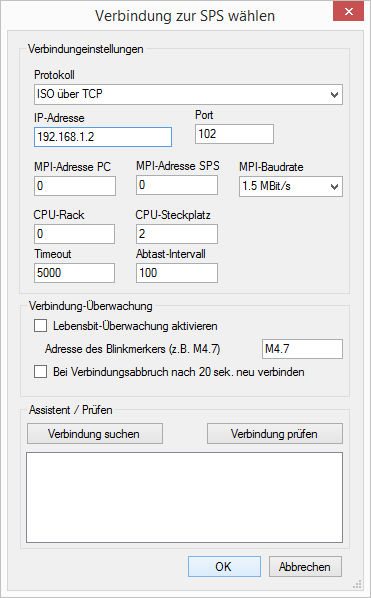
Sample configuration for a Siemens CP 343-1 Lean.
This configuration should apply to all S7-300 and S7-300 CPs with Ethernet connection.
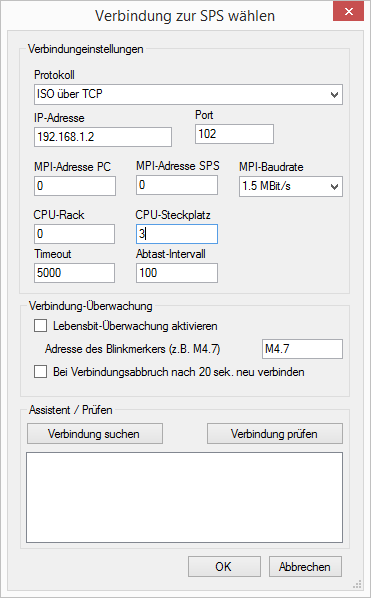
Note: If you have problems, try setting the CPU slot to 2.
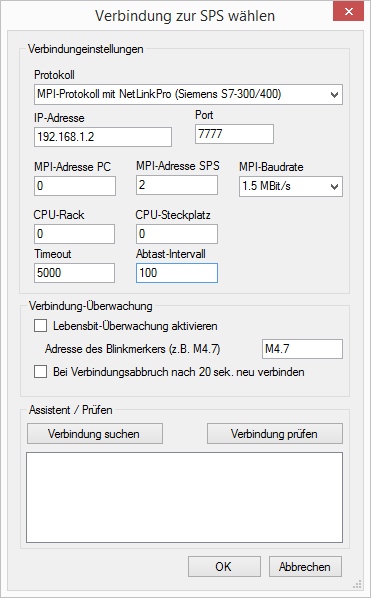
Online connection with NetLinkPro via MPI or Profibus (eg S7-315-2DP)
14. April 2017
Using the NetLinkPro adapter from Deltalogic.
If the adapter is connected to the Profibus port, the protocol “DP protocol with NetLinkPro (Siemens S7-300 / 400)” must be set. The remaining settings are valid for the Profibus. For example, the Profibus address of the PLC must be entered at “MPI address PLC”.
Sample configuration for a Siemens CPU S7-315-2DP.
This configuration should apply to all S7-300 and S7-400 CPUs with MPI or Profibus connection.
Online connection via Profinet (eg S7-315PN)
14. April 2017
Sample configuration for a Siemens CPU S7-315PN.
This configuration should apply to all S7-300 and S7-400 CPUs with Profinet connection.

